STOP! Before you buy your wedding dress online, read this....

I'm an online shopper. I prefer it to in-store shopping, actually. Clothes, beauty products, trash bags, plants, tools... anything I can buy online, I will. I've never really had a problem with it, either! Sure, sometimes the clothes I buy don't fit, but returning has always been a breeze.

Naturally, when it came time to buy a wedding dress... I turned first to the internet.

Call me naive, but I have a pretty "off-the-rack" body. I was embarrassed to strip down to my skivvies in front of my sisters, in-laws and mom. (That wedding bod is still a work-in-progress, guys!) And, since online shopping had been so good to me in the past, it seemed like the perfect solution.

I totally got scammed. 

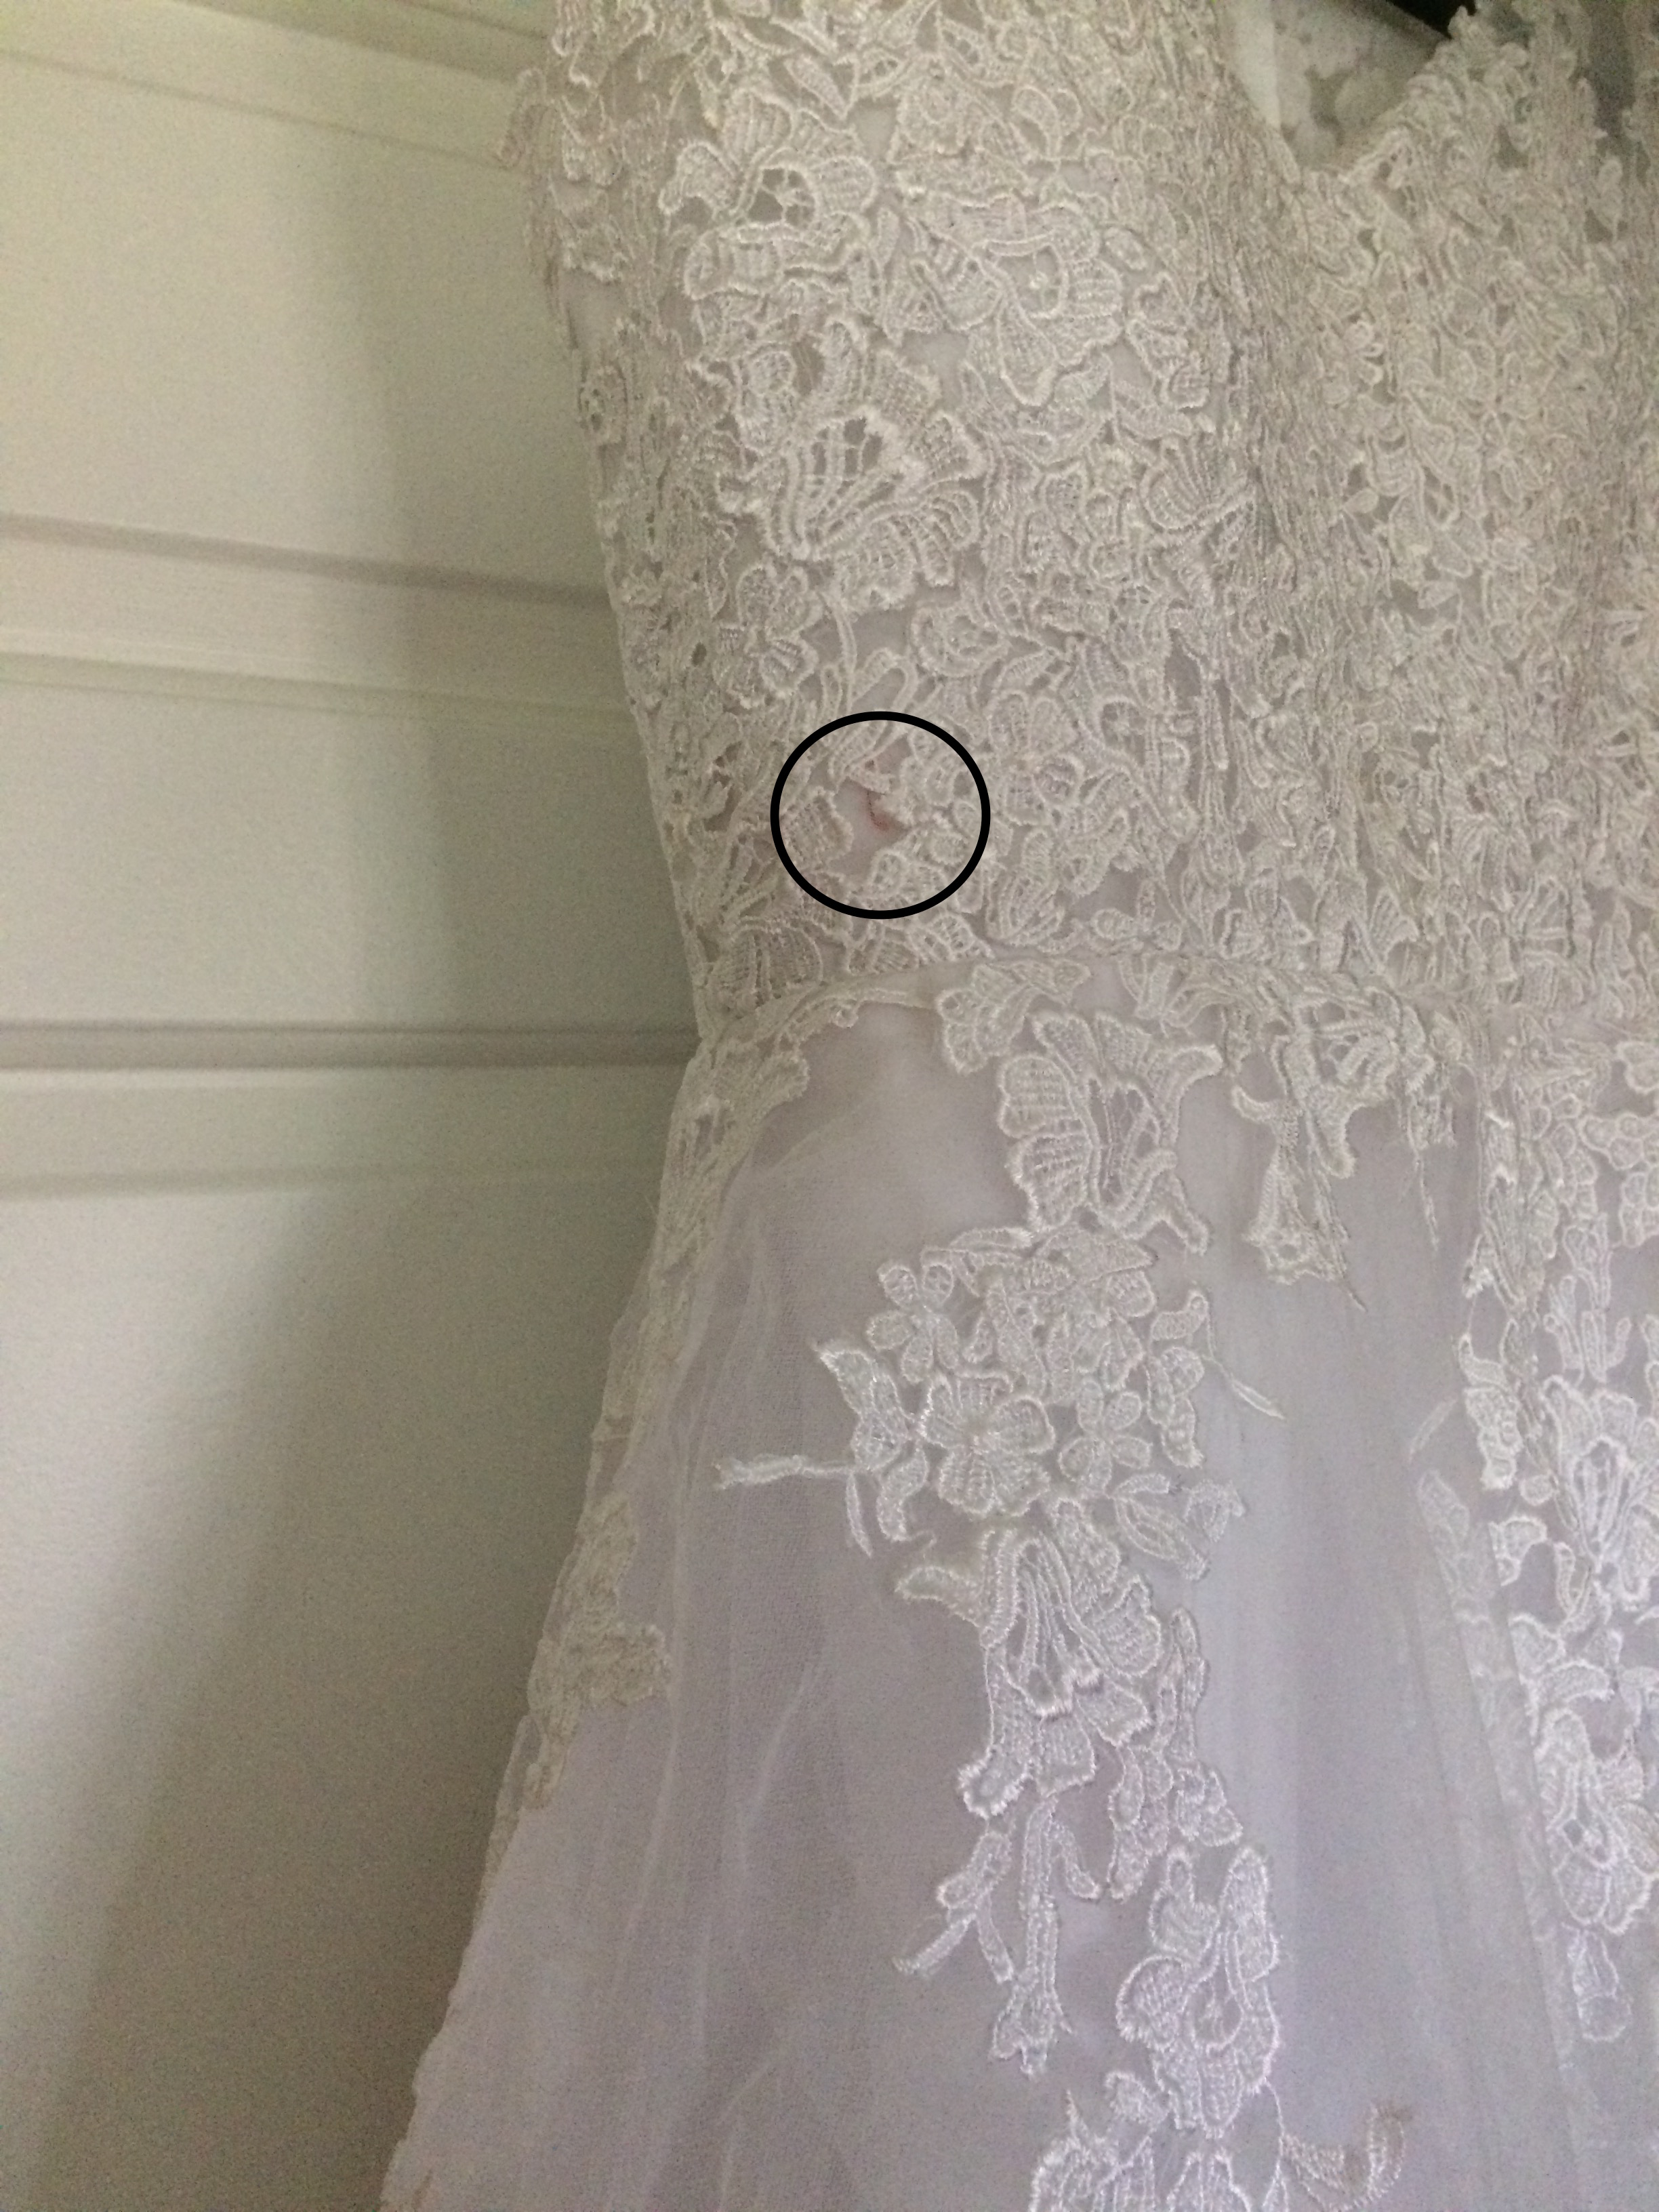
On Thanksgiving, with a little wine in my system and a belly full of mac n' cheese, I ordered a dress I had been stalking on Pinterest from a site called Amy's Bridal Shop. The site was... not the greatest. There was only a single picture of the dress (you can see it above), and it was very pixelated. But,"They're a small little boutique," I said to myself. "Probably don't have someone to build them a real site."

Ugh.

I checked out through Shopify. Four weeks passed. I sent a message to the email address that had sent my confirmation. A few days later, I received a reply. "Hi Annie, It will be there soon."

The dress arrived a few days before the holidays. I plopped it in my suitcase to bring to Ohio, and, over mimosas with my sisters and mom, we unpacked it.

Guys. It sucked. First and foremost, it was NOT the dress in the picture. There was a red permanent marker line down the side, about thirty layers of tulle and HOLY was it unflattering.

I scoured the website for a contact number. Nothing. I checked the links to their social channels, hoping to send a message through FB. Nope. All the icons, from Pinterest through Twitter and beyond, linked to nothing. I sent a nice note to the email address from before. Nothing. Weeks passed. I sent another, more angry one. Nothing. Another week passed. I sent a scathing email. Nothing. 

Eventually, I had to contact Shopify, and they told me to report fraud to my bank. It's been three months. I still haven't gotten a refund and the not-dress is hanging in my room in Ohio as a huge poofy reminder of my mistake. 

Guys, online shopping is great, and some people have had success with it even for their wedding dress, but I didn't. 
So here's my advice: if you decide you want to buy your wedding dress online, read these tips first:

  • Make sure the site is connected to a legitimate store. 
  • Find a clear contact number on the page. Call it to be sure it connects somewhere.
  • If at all possible, try the dress on at a physical store before you purchase. 
  • Confirm that all the social media icons connect to a real social media account.
  • Look for clear refund and return policies listed prominently on the site.
  • Find positive reviews for the store and product before you hand over your credit card.

Planning a wedding brings a lot of emotions with it. It's easy to get swept up in it, and order a dress from a clearly scraped site. Don't make my mistake. 


In the end, I found myself at a BHLDN Show Room. BHLDN is owned by Anthropologie and the show rooms are connected to a few select stores around the country. It was wonderful. I found a beautiful dress & there's no tulle in sight ;) 

DIY: Over Stove Spice Shelf

Over stove spice shelf

SPICES. Kind of hate to love them. Oh, I mean, spices totally make or break a meal. But good LORD - does anything get you more peeved than trying to retrieve a spice from the back of your cupboard?

At my old apartment in the TenderNob, I kept my small amount of spices on the windowsill above my sink. I've since moved in a with a roommate who actually knows how to cook, so, combined, our spice situation was out of control. Neither of us were happy, so we brainstormed a solution: utilize the weird above stove space as a home for our many bottles of spice. Like the single file nature of my window sill, a skinny shelf would make our spices easier to see, plus, bonus, easy access while we cooked! 

I used: 

Over stove spice shelf
  • Two (2) 38in x 3.5in pine project boards
  • Two (2) 38in x 2.5in pine project boards
  • Four (4) C-clamps
  • Wood Glue
  • Level
  • Power Drill 
  • Two (2) brackets
  • Sand paper
  • Goat hair brush
  • Polyurethane 
  • 22 screws 

So, this is what we were dealing with....

Spice Chaos
spices
spice chaos

Here's what I did:

Step one: Sandwich the Project Boards

Project board is very thin and flimsy by nature. Alone, I was worried it wouldn't be able to hold the weight of our spices. I decided to sandwich the two wider project boards to make it a bit more sturdy. Using wood glue, I placed one board directly on top of the other. With four c-clamps I secured it for drying. Then, while the wood glue was still wet, I used a power drill to secure ten screws into the project-board-sandwich, to aid the c-clamps. If you do this step, be sure to choose screws that are long enough to reach both levels of the project board, but not long enough to break through the top. 

Here's a picture of the finished sandwich :)

Sandwiched project board

Step two: Sand and Polyurethane

After 24 hours, my wood glue was dry. I removed the c-clamps and sanded the sandwiched, thicker board. At this point, I also grabbed the two thinner boards and sanded them as well. Following the directions on my can of polyurethane, I applied two coats to each side of all the boards with a goat hair brush, several hours apart. This step is important because, at its spot above the stove, the shelf will be exposed to water, steam and other liquids. The polyurethane should prevent warping.

Step three: Build the shelf

When everything was dry, about two days later, it was time to build the shelf! The base of our shelf is the wider, sandwiched project board. Using three screws, I attached the skinnier project board to the front of this piece at a 90 degree angle. My intent was to make a "wall," so the spices could not easily fall off of the base. I did the same to the back side with the second skinny project board.

I don't like this picture because the brackets aren't flush (I readjusted before hanging), but this will help demonstrate what you're doing....

Spice Shelf

Step Four: Attach the brackets to shelf

Flip your new shelf over, so the bottom is in the air. Screw the brackets, flush, to the bottom of your project board. Again, be sure to use screws that aren't long enough to break through the top board.

Step Five: Screw Shelf to Wall

Voila! With a level and a screwdriver I hung up our new spice shelf! Unfortunately, the brackets I chose were too long for my un-flat wall, so I could only utilize the screw holes at the top of my brackets. The bottoms hang off into the air, a bit, but it still gets the job done. If this happens to you, too, just make sure to prioritize the screws at the top of your brackets since they will be bearing the real weight of your spices. As a side note, you can find brackets of all sizes at your local hardware store, I just didn't measure before choosing mine.

Over stove spice shelf

What do you think? We love our new shelf. It's already wayyyy easier to find what we need and it looks much cleaner!

Costs

Project board: $2.50 per = $10
Screws: $4
Brackets: $20
Tools/Polyurethane/Wood glue: Had
Total: $34!

Your Favorite Posts of 2016

Friends! How was your New Year? I stayed in with Jake. We (read: he) made a delicious dinner and we toasted with champagne and ice cream sundaes at midnight. 2017 is going to be one for the books, with our wedding right around the corner, but before we go head first into the new year, let's reflect a bit, shall we?

What were my biggest moments of 2016? 

  • Moving into a new apartment (& out of the Tenderloin, huzzah!)
  • Starting a podcast!
  • Getting engaged.

What about you? What will you remember when you look back on this year? While you take a second to think about it, here's a list of the blog posts you loved the most in 2016, chosen by # of page views in my trusty google analytics account. 

xox


A Clickable Gift Guide: For the Commuter

Commuter Gift Guide penfield rain jacket chelsea hunter rain boot everlane modern commuter backpack jockery power pack wireless earbuds hyfroflask waterbottle

Guess what you guys! I co-host a podcast! Seriously! It's all about the weird sh*t that happens on my commute.. and that's a lot of stuff. I mean there are men that cut their toenails on the train, bag ladies that push my co-host into oncoming traffic, and so. many. uber. drivers.

It's called Scenic Route, and there are seven episodes already waiting for you in iTunes. Plus, one more on the way!  It goes live Wednesday, just in time for holiday travel. That's where this gift guide comes in. This week we're doling out last minute gift ideas for the commuting friends in your life. 

We're pretty much experts in this department, so click on the images and choose something, quick! Only have a week left til Christmas! 

xox


Introducing: Jake

Engagement Photos on the Beach

So I've been keeping a secret, albeit not very well.
I've been seeing someone. A really awesome someone. For the past three-ish years. 

It's been hard to keep it from you! Jake is a huge and wonderful part of my life. & he even works behind the scenes of Ida Street quite a bit – with the code, the photos, the concepts, the editing, and the projects. 

But a really long time ago, I made a rule that I wouldn't introduce any love interests to this blog until they were a permanent part of my life. So I guess thats a nice tee up to what I wanted to tell you today:

We're engaged!

Engagement Photos
Engagement Photos by Natalie Folchi

This summer was very busy, we bounced from one wedding to another, and from work event to work event. In October, I moved into a new apartment! & funny story, my uHaul caught on fire! It was the worst! Trying to figure out that fiasco, and then making the plans for this new place have pretty much taken up all my time. Not to worry though, some new DIY projects coming your way soon!

Later that month, during a hike along the Pacific Ocean, Jake proposed. My family secretly flew in to help us celebrate & literally that night, I lost my voice and started a week long illness!  

Stuck on the couch in sweats with laryngitis, I pressed publish on the first episode of Scenic Route – a storytelling podcast I co-host with my future sister-in-law. It's so fun, and pretty funny, so take a listen ;)

The next two weekends brought our first visitors in this new apartment, including my bestie Natalie who took these amazing engagement photos for Jake and me! Seriously, couldn't you die?! So romantic!  

The work front has been in full swing, too! Part of my job is planning events for our sellers, and Holidays sure are a popular social time. So all that is to say, I'm sorry! It's been a little busy and I've been neglecting you. But I hope you're excited to finally, finally meet Jake. It's been a long time coming. 

You guys are gonna like him. 

Girl in the mist

Annie wearing: dress / shoes / engagement ring.

Engagement photos at Black Sands Beach

Wanna know a little more?

Wellllllll... Jake and I met in 2013 in Cincinnati, which is where we will be returning for our wedding this May. He's a computer engineer, a kind soul, a strong back massuist, a super smarty pants, a builder, a bicyclist & and a great cuddler. He's also pretty easy on the eyes ;)

Black sands beach
Black sands beach
Black sands beach engagement

Jake wearing: shoes / pants / shirt

It's been so fun planning our wedding, and I'm so glad I finally get to share it with you! So I guess that's it! The cat's outta the bag! Send all your wedding tips this way! xox

Photos by Natalie Folchi / Location Marin Headlands, Black Sands Beach / Annie's dress / Annie's shoes / Jake's pants / Jake's shirt / Jake's shoes