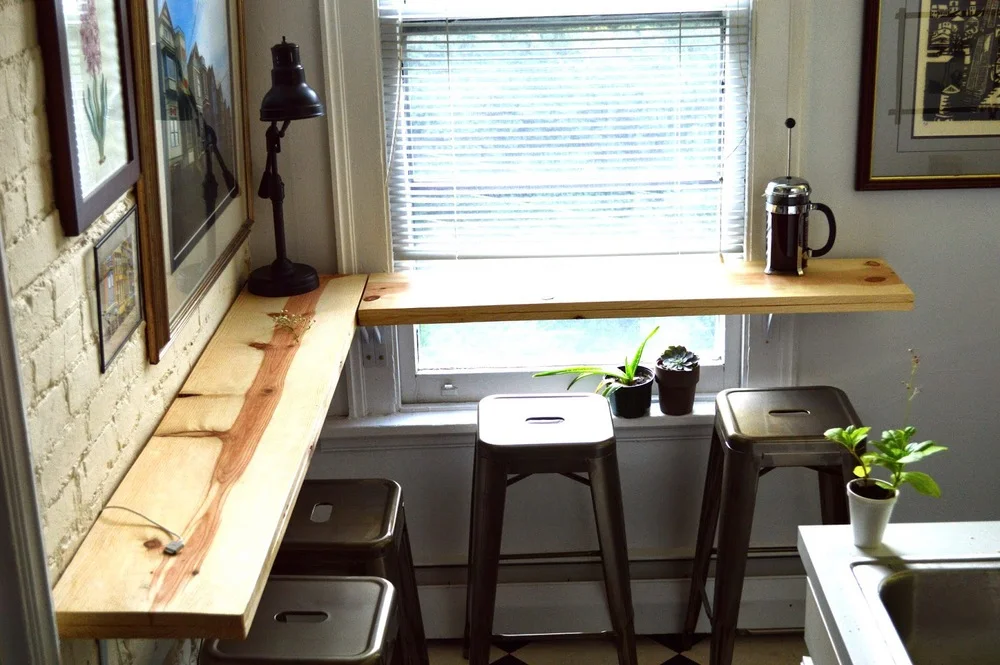

I knew as soon as I walked into The Studio that it was the place for me. The only slight problem: in a world where everything is tiny, a tall-large-square kitchen table doesn’t quite fit the bill.
Actually, it did fit. But it cut off an entire side of my U-Shaped Kitchen, creating an obstacle course to get to my morning coffee. & I don’t know about you, but I am in no condition to be doing an obstacle course before my morning coffee. None. At. All.

I’ve quickly learned since moving into The Studio, in a small space, If you can’t put it down, you need to go up! So, the plan was to replace that hunky table with a wrap around coffee shop-type bar attached to the kitchen wall - making room for my brunch guests, but saving room on the floor.
Guys, before the Corner Coffee Bar, I had never built anything in my life. Not even an Ikea piece of furniture. That I can successfully eat breakfast while I browse the web at this corner coffee bar means 1) I danced around my kitchen doing the “OMG I'M BUILDING SOMETHING!!!!!!!” dance all along the way & 2) YOU can do this, too. If you wantJ
You will need:
- Three 1 inch x 12 inch by 8 ft. Common Boards (hint: get the ones with the coolest “tree” designs. Mine have amazing knots that I love.) *these were the measurements I needed for my kitchen specifically, you should measure your space before you go to the Hardware Store.
- Sand Paper
- Wood Glue
- C Clamps
- Five Wall Brackets
- Brick Screws + drillbit (did I mention my kitchen is brick?)
- Wood screws + screwdriver
- Level
- Finishing Wax
- Clean Rag/Old T-Shirt
Basically, I started with research (ever so responsibly). I have always loved this Standing Desk by A Beautiful Mess & I also found this DIY Window Cafe by Offbeat +Inspired. I used them as guidelines to build my Studio-Sized Corner Coffee Bar. It's pretty easy :)
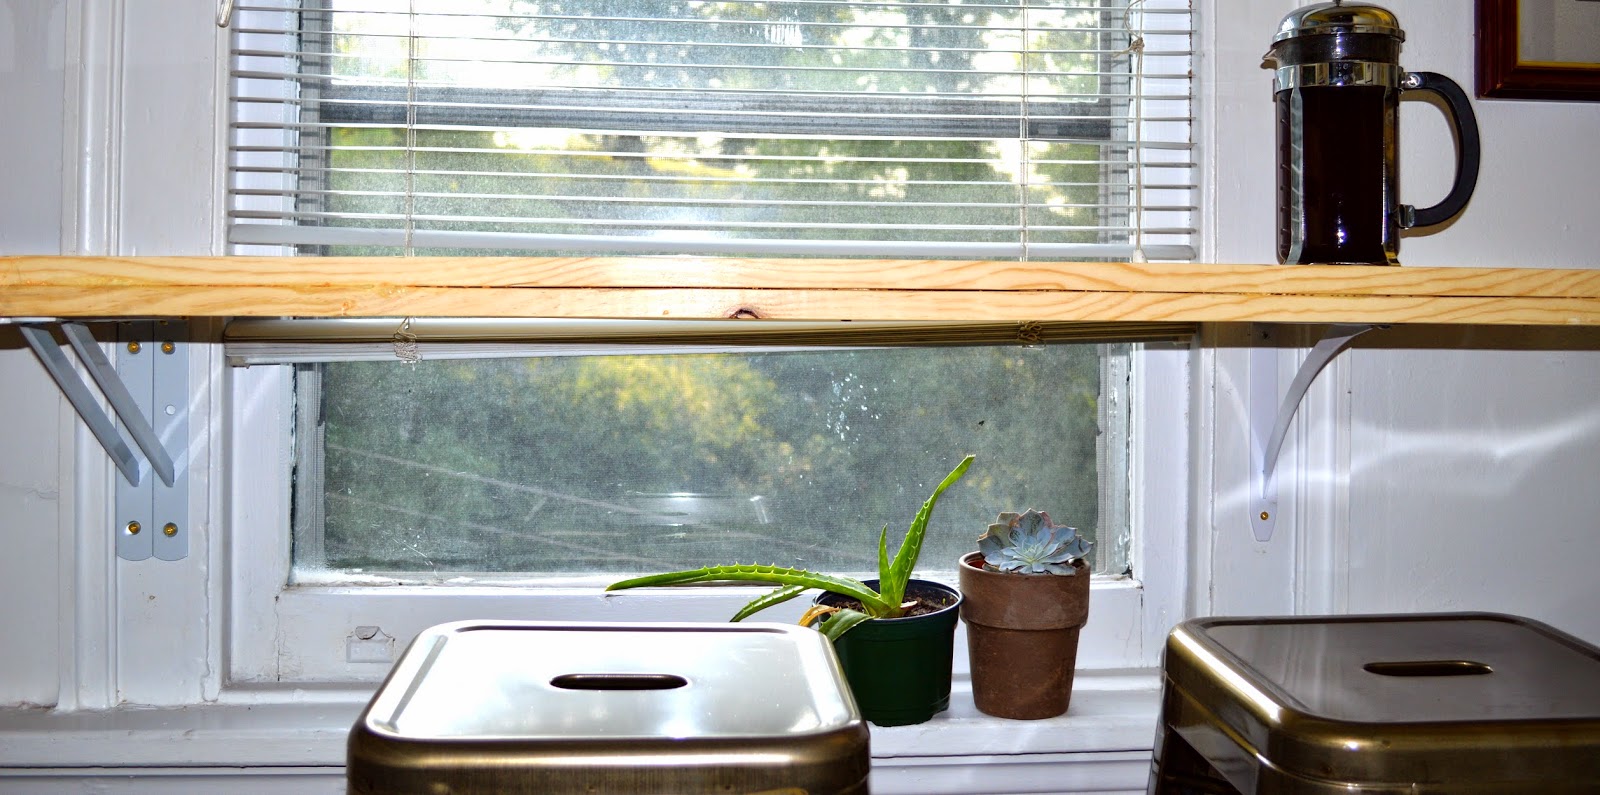
Measure. Measure how much wood you will need for one length of the wall. I knew I wanted mine to be a foot wide (I'm working with a small space, remember. I'd go a little wider if you can). I measured the second wall (the short wall) length by hacking off a foot on one side to make what I call "an easy corner."

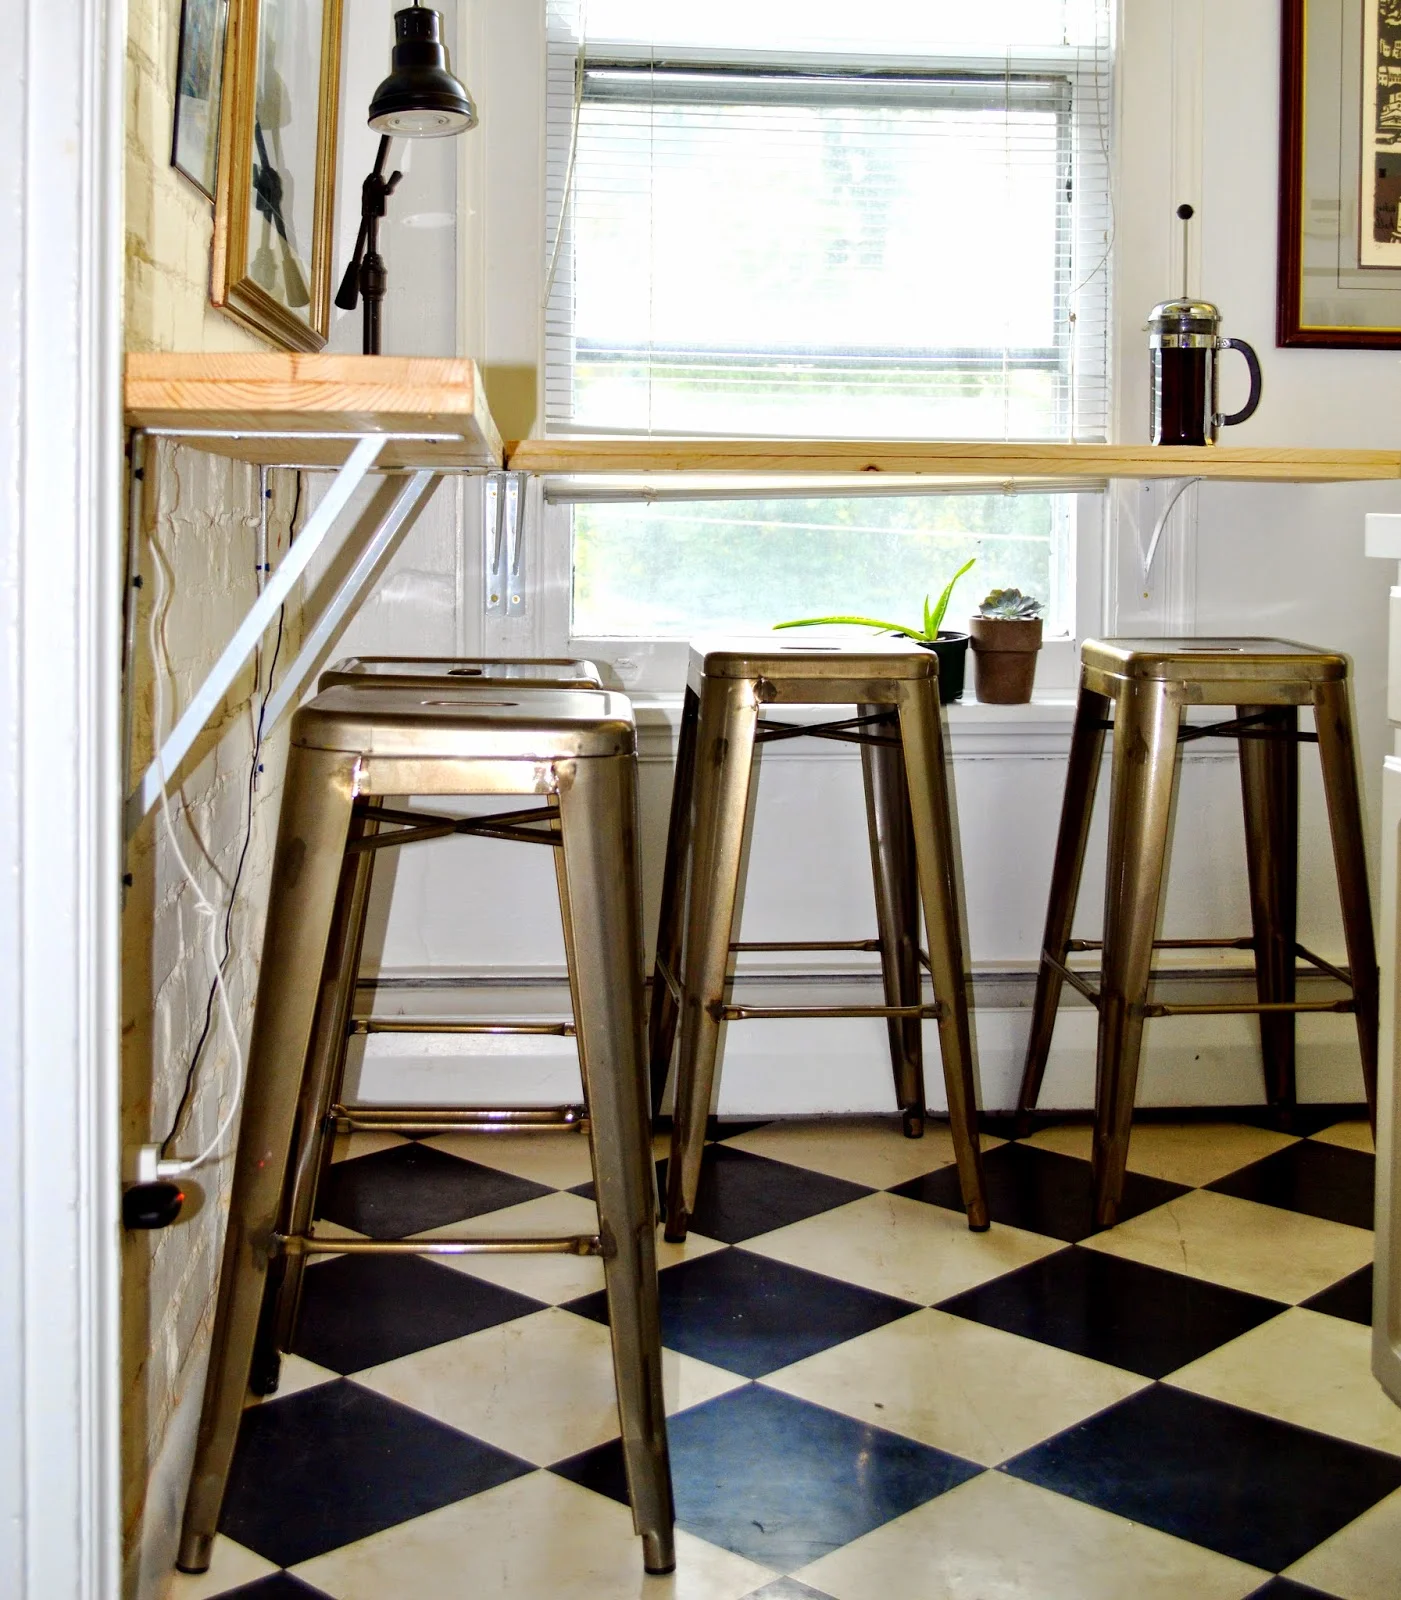
At this time you’ll also want to measure about how high you want your Coffee Bar. Base this on your stool height. It should be comfortable to sit, cross your legs & work at this height. Mine is 50 inches from the floor, 14 inches above the stool. Mark a line & level it out. This is also when I marked out where my brackets should go (spread evenly across the weight of the boards. NOTE: I got the biggest ones I could that didn't exceed the width of my boards. Also, I did not have to worry about finding studs, its a brick wall. Click here for tips if you're working with a non-brick wall.
Hardware Store. Guys, I went to the Hardware store three nights in a row for this DIY. No joke. (They thought I was hilarious.) Anyway, I learned you get 6 free cuts at Home Depot - so ask them to trim your two long boards to size (you’ll be stacking one atop the other). I had them cut the third board (for the short wall) straight in half.
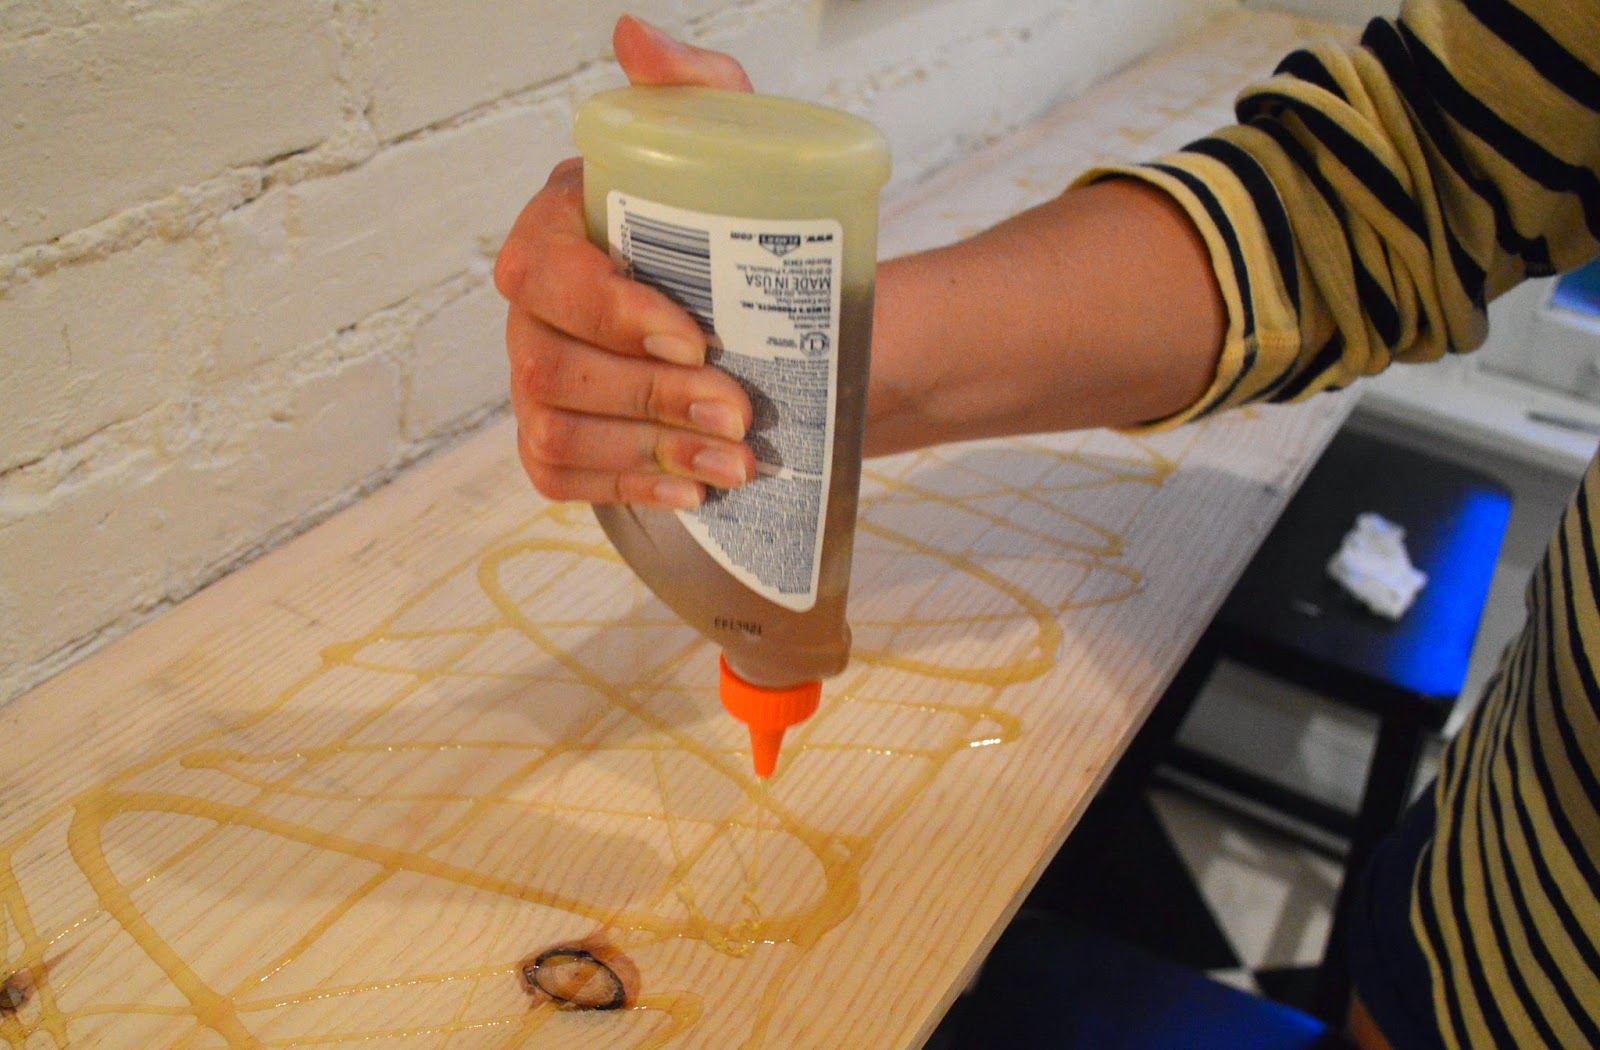
You’re Home. Sand those babies down. Then it’s time to double layer them. Put the prettiest side of the board face down. Layer it with wood glue, avoiding the edges by an inch because as wood glue dries it oozes & expands. Sandwich the boards. Then in two rows down the middle of the board, screw in about 15-20 screws. This is essentially extra support for the wood glue. Clamp & set aside. Repeat with the short boards.
Add the Brackets. Remember when you marked where your brackets should go? Screw them in!
Add the Boards. Place your double layered long common board on the wall atop the brackets. LEVEL, LEVEL, LEVEL. Readjust the brackets if you need to. This step is so important. (Trust me.) (I really messed this one up at first.) (My mom had to rescue me.) Now, do the same with your short board, trying to make the corner as flush as possible. & level again. Then, screw the boards to the brackets!
Wax. I got a Clear Finishing Wax, but you could also stain this. I happened to like the light wood look in my light kitchen. Let it dry completely before you put on another layer (don’t worry.. that only takes 15 minutes.)

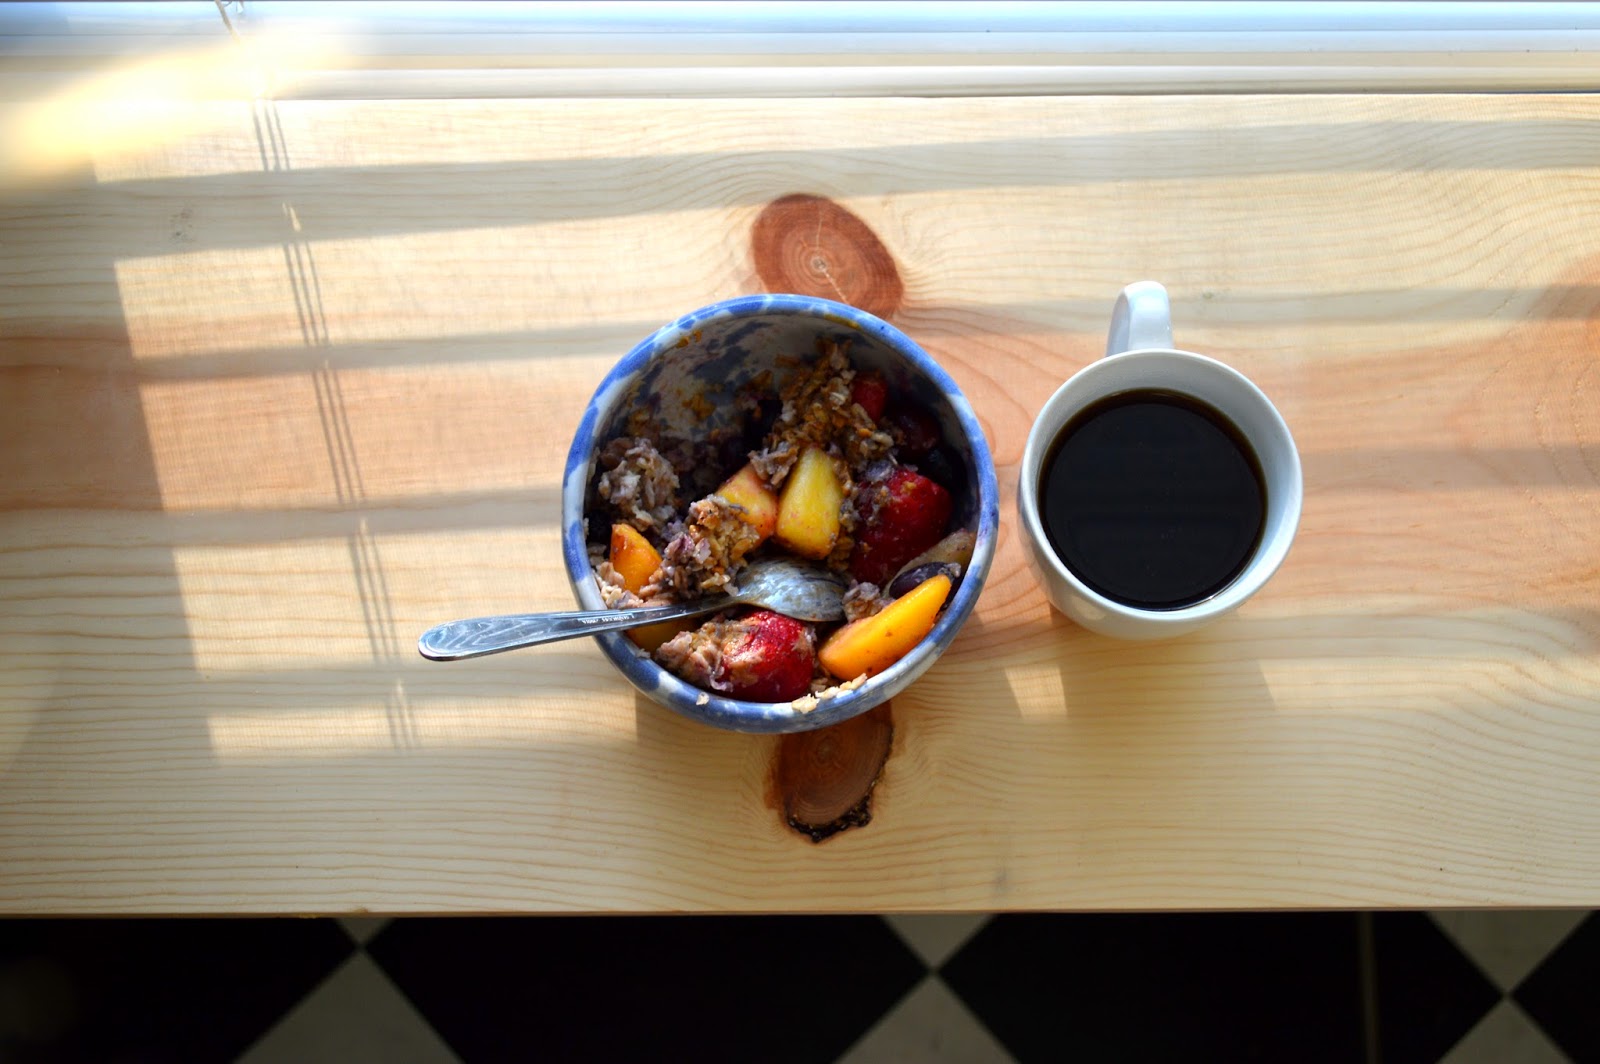
& THAT’S IT!! Doesn't it look good? The best part is, now, even in a little Studio Apartment, I can still host a whole lot of Brunch :)
What do you think y’all? Are you going to try it? You can see the Before & After shot HERE.