Small Space Living

Annie's Studio Tour

Cute option for electrical wires

Hi, friends! 

I thought today we could take a little tour  of the rest of my studio :D First, a reminder about what the space looked like when I moved in..... Here's the "before" post and you can see a few transitional photos below. 

Small studio Before and After
Small SF studio before and after

It's filled with stuuuuuffff!!!! Woohoooo! I had to take a really slow approach to decorating this space due to some financial constraints, but slowly and surely (and 10 months later) this room really came together. You can see the finished product in these detail shots below. I've also put together a list of a few small strategies that made a big impact in this teeny-tiny studio.

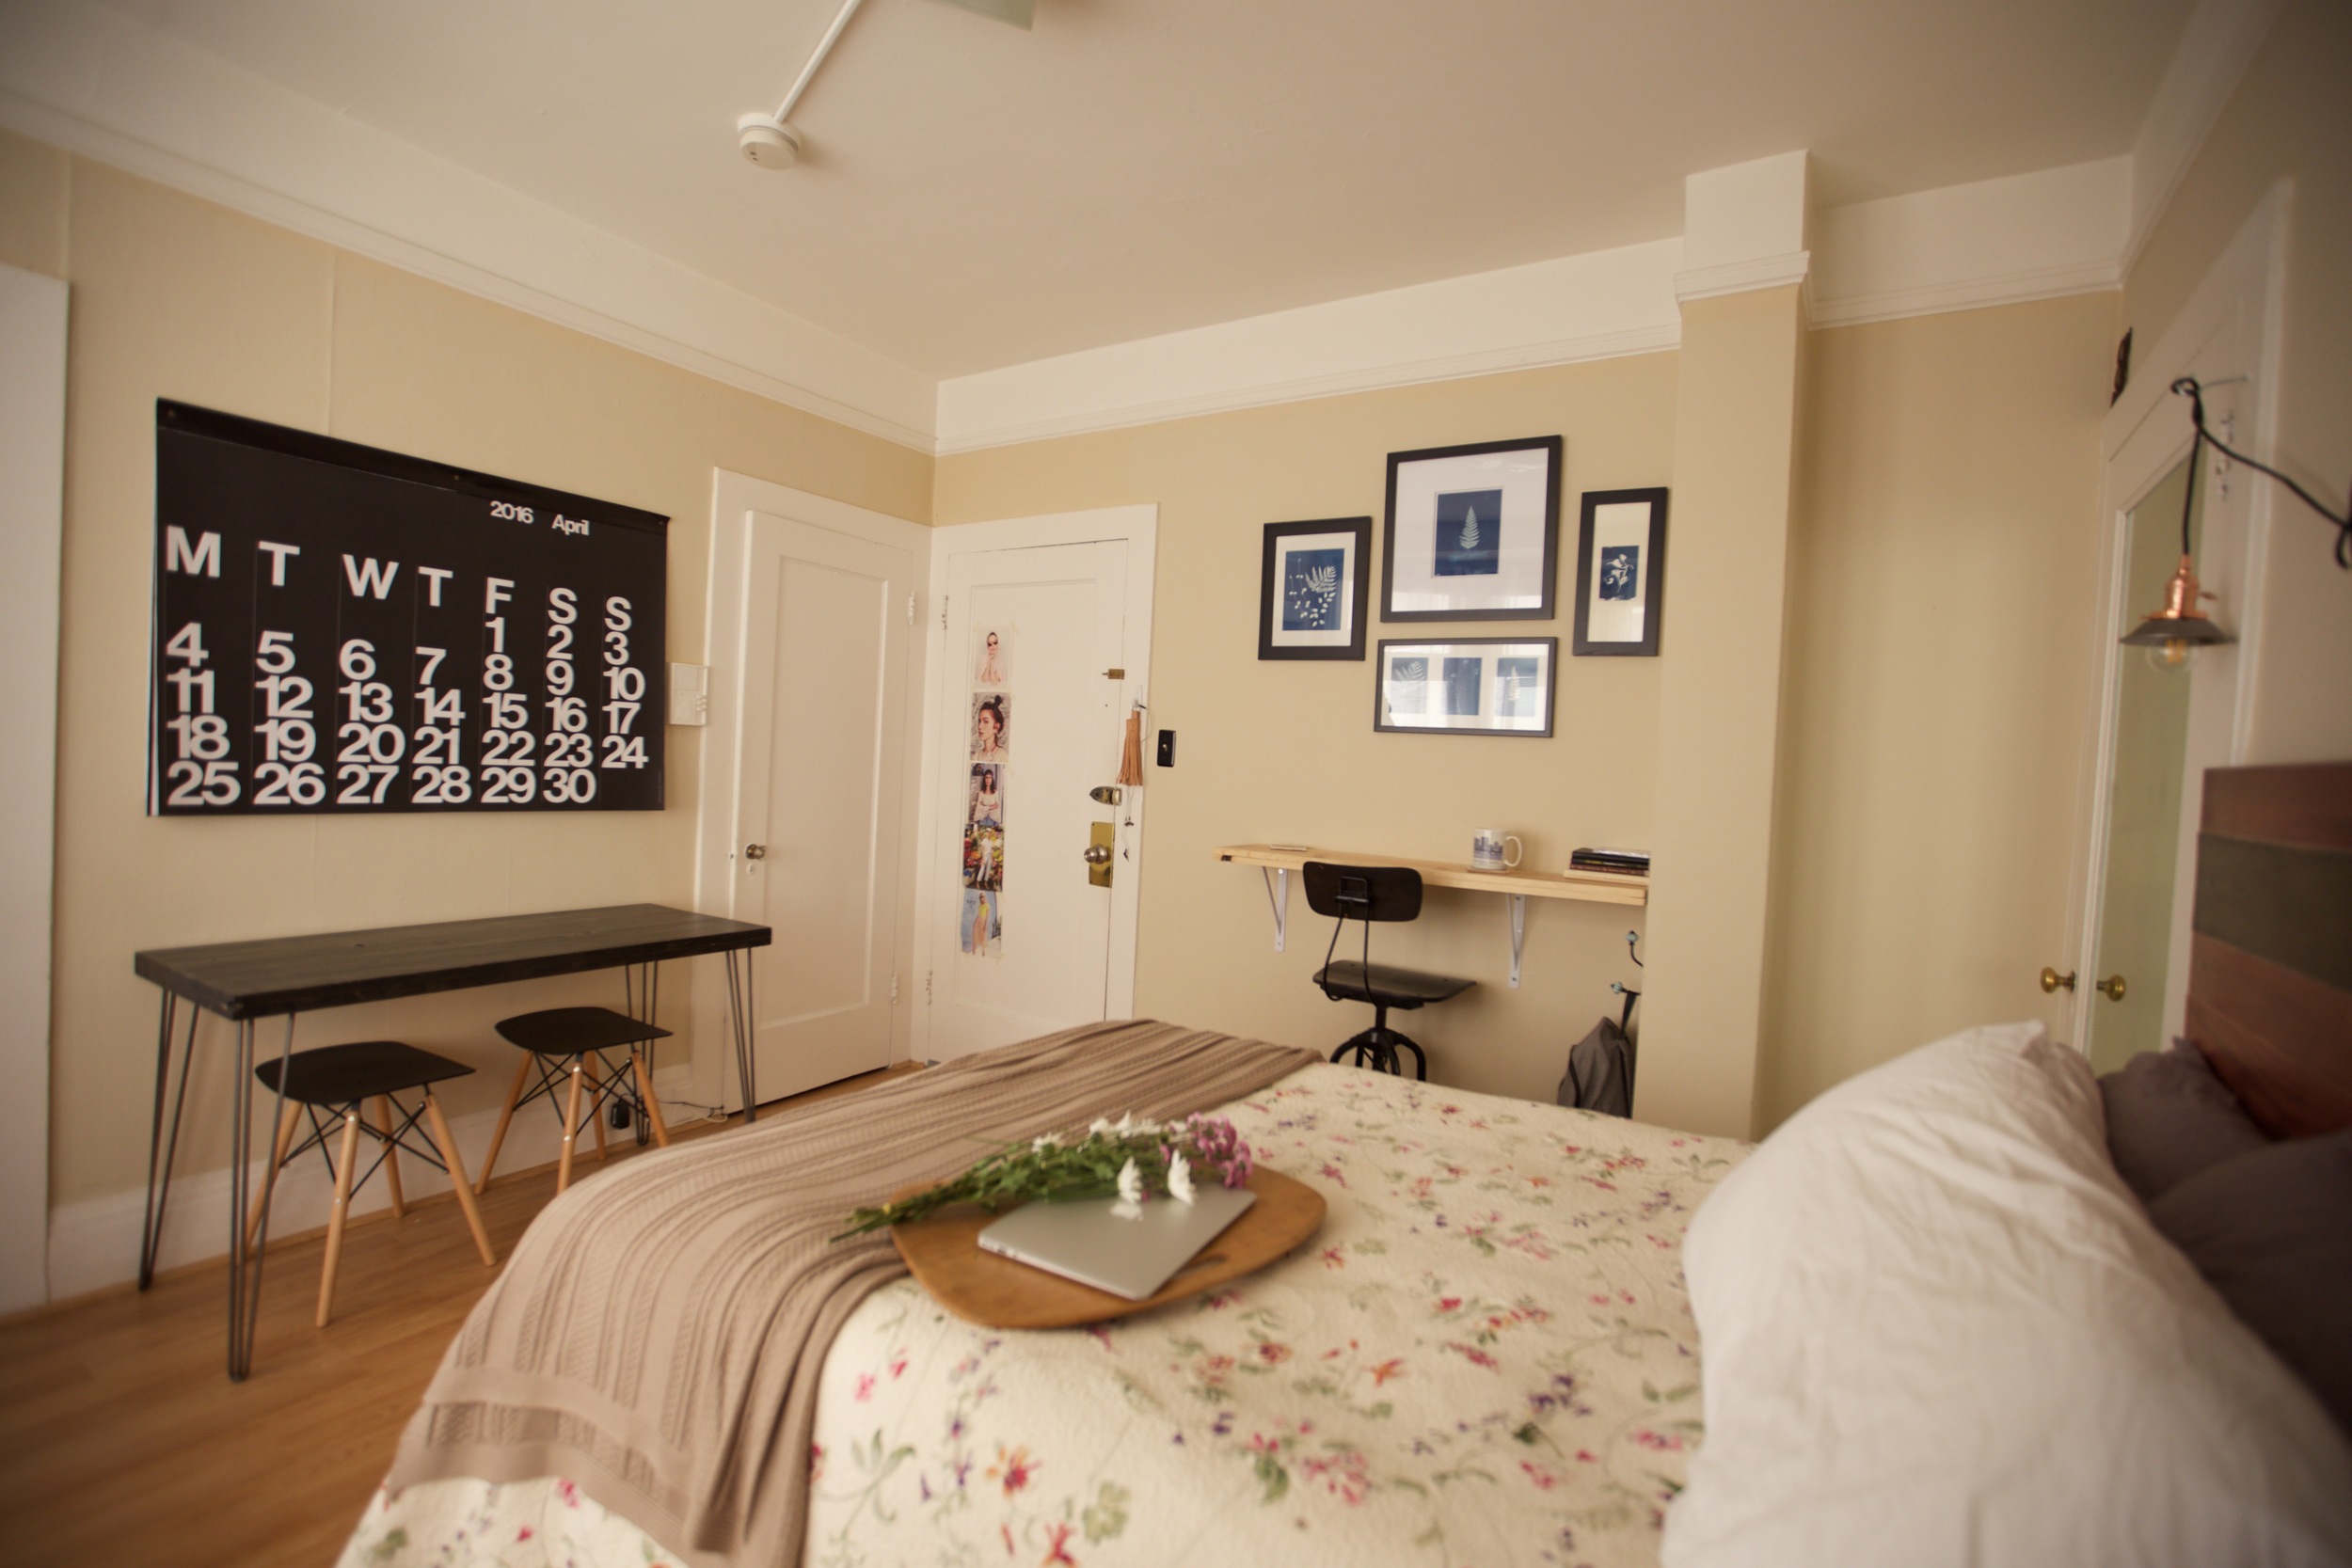
  • Remove visually solid items: When I first made my kitchen table I had solid desk legs and solid backed kitchen chairs. It didn't take long before I replaced those with the airy hairpin legs and modern style stools. The moment I did there was SO much extra room in my apartment. Being able to see through the legs and stools just makes the room feel bigger. Not to mention, storing the stools under my table when not eating literally does give me more space:)
  • Break up the space into "areas." Even though my apartment is basically one big room, I tried to make four distinct areas and visually separate them. My "living room" is defined by the shaggy rug. The "dining room" is the space taken up by my kitchen table. My "office" is the standing desk on the wall, defined by a gallery installation. And the "bedroom" is, well the bed :)
  • Headboards are so adult & I finally understand the value. They make a HUGE difference in bringing together a room. I didn't have a headboard for the first nine months I lived here and my apartment really never felt finished until I did.
  • DIY!! In a small space, you might need unique pieces to fit a unique layout. Don't be afraid to custom build your own furniture to make it the perfect fit :D 
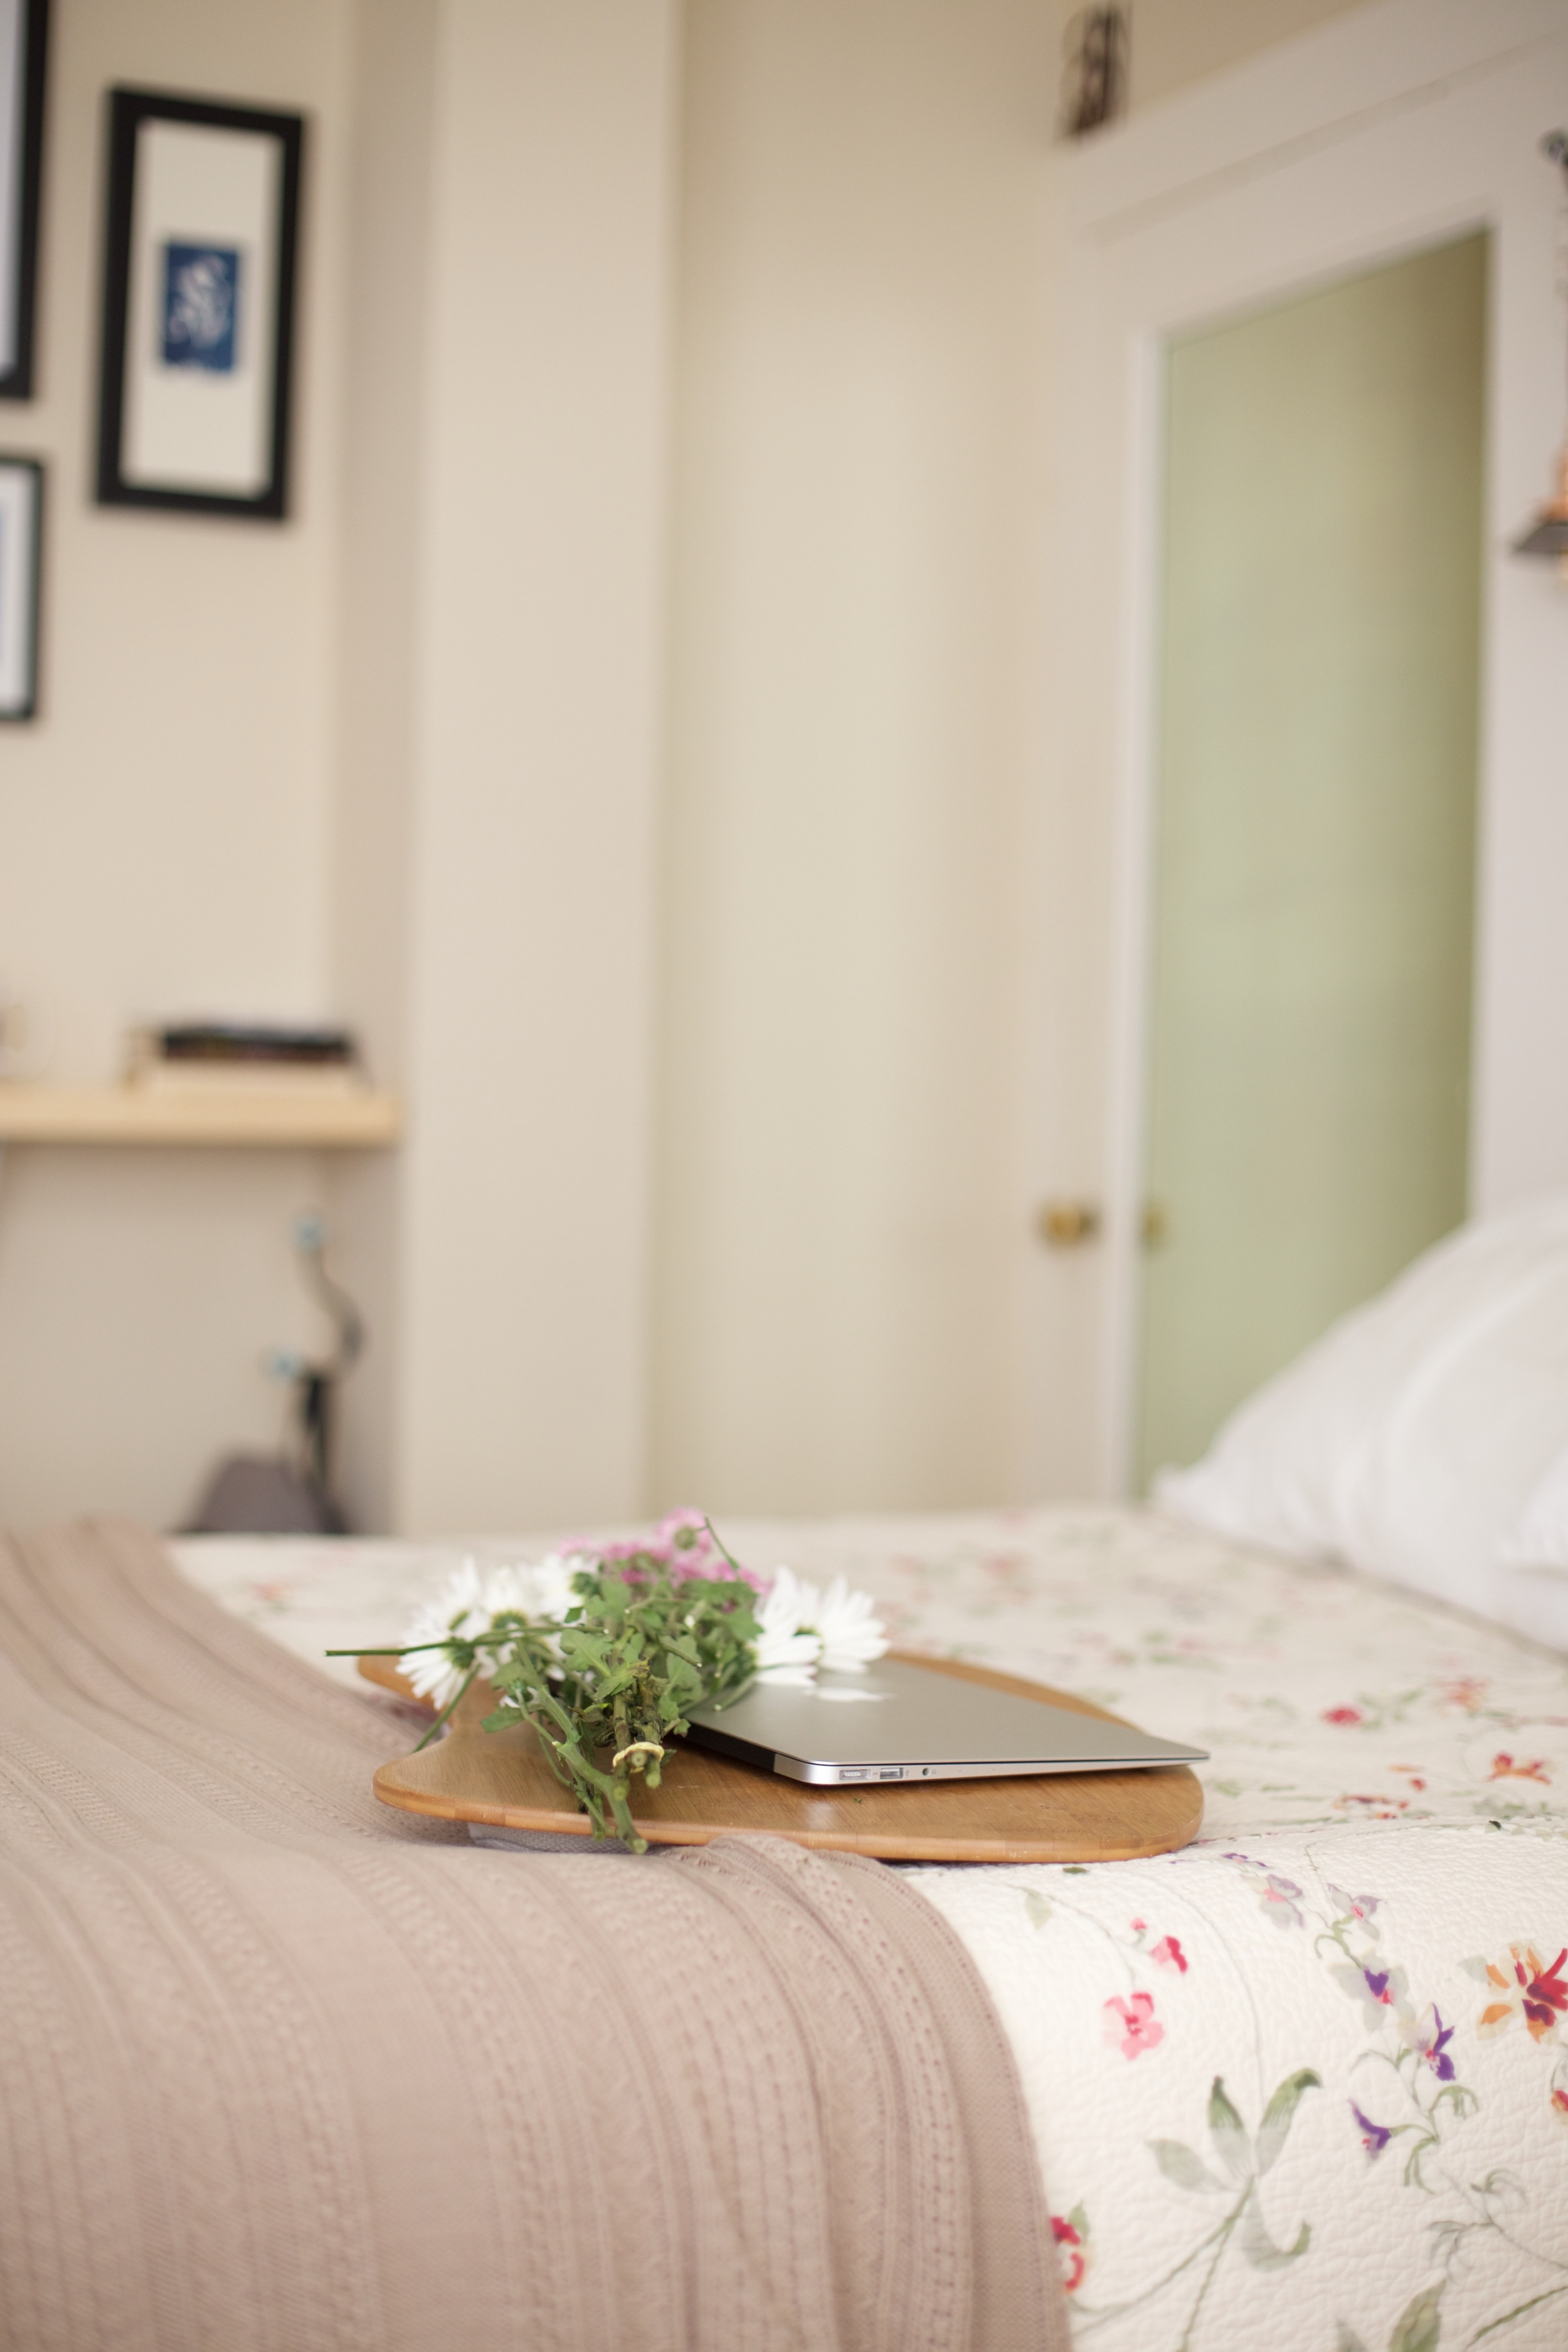
  • Lastly, live in your space. There's no need to decorate your apartment right away. Live in the space, see how you use it and what you really need. It will make the finished product that much more perfect. I really struggled to find a place where I could put a tv, but after a few weeks in my apartment I realized I didn't even need it! I use my laptop to stream Netflix & crash on a friend's couch or plan a trip to a bar if there is something on the actual tv I want to watch. 

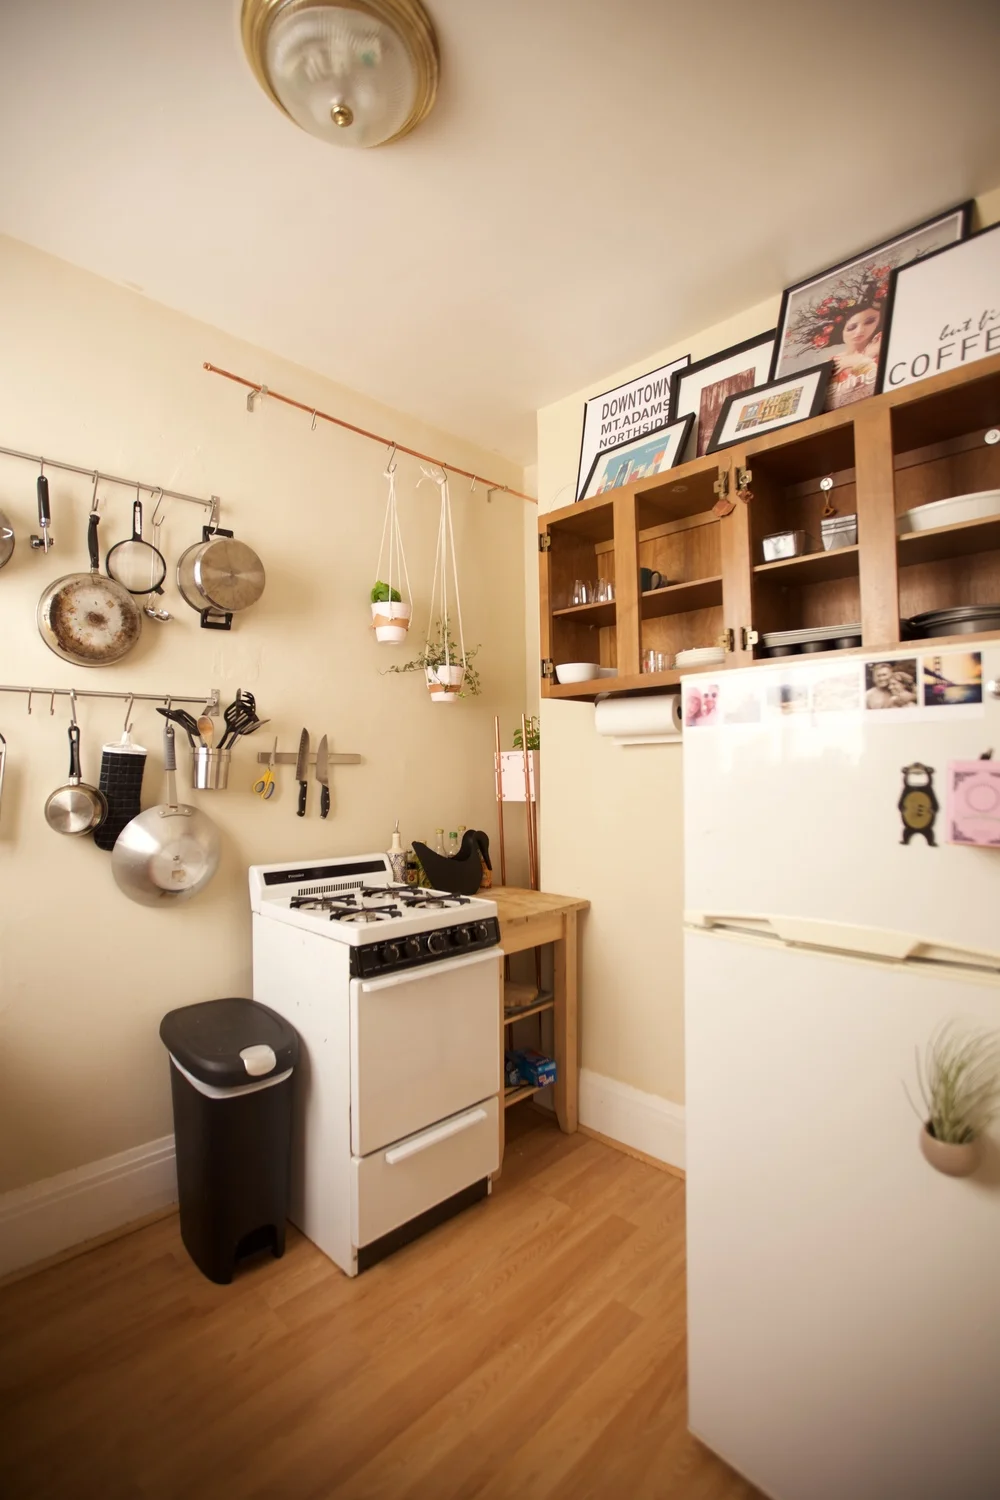
Since you saw the finished kitchen a few weeks ago, this concludes my apartment tour. Ringing in at a whopping 275 square feet, this is probably the smallest space I'll ever inhabit. It's been a really fun challenge to design a space that worked for me, and I hope you enjoyed peeking into my life! xox 
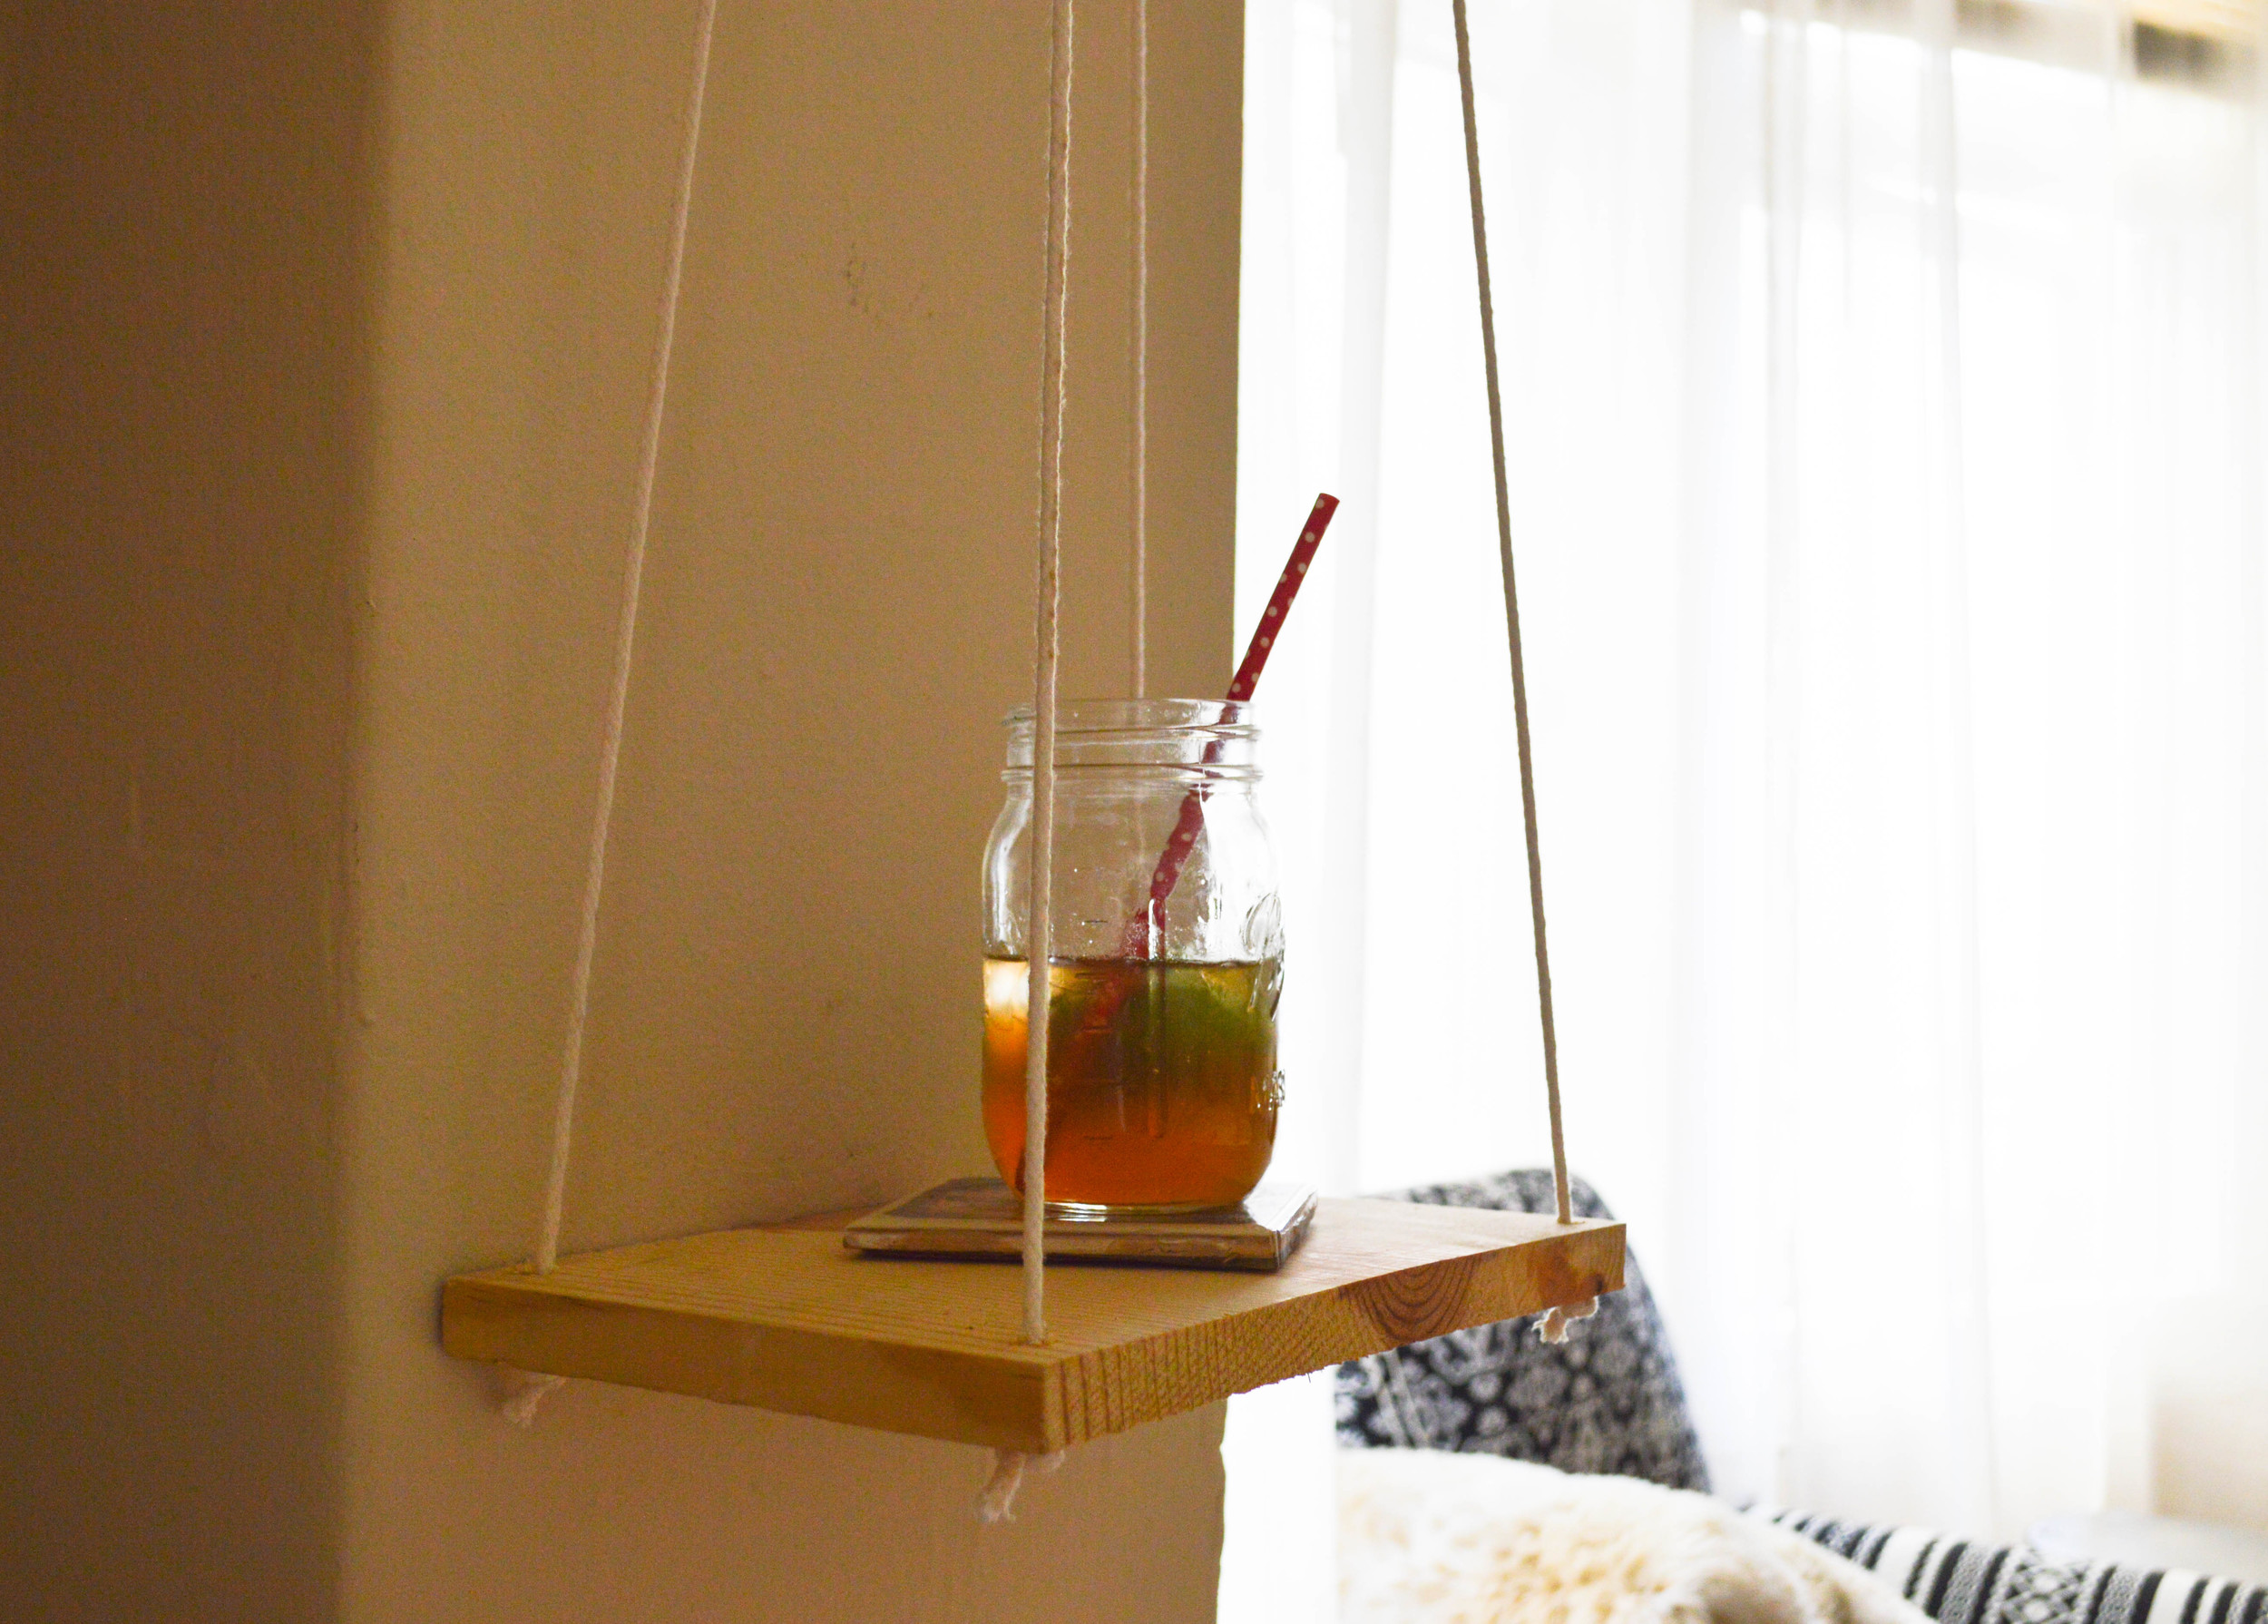
Cute Tiny Apartment
Cute Tiny Apartment
Cute Tiny Apartment
Cute Tiny Apartment
Cute Tiny Apartment
Cute Hanging Side Table in Tiny Apartment
Cute Tiny Apartment
Cute Tiny Apartment
Cute Tiny Apartment
Cute Tiny Apartment

Photos: Diana Lustig Sources: DIY dining tableHairpin legs; Amazon Kitchen stools; Stendig Calendar;  DIY standing desk; Restoration Hardware bar stool (Thrifted); Mintwood Photo Co. Cyan-o-matic plant prints; Hickory + Co "Cincinnati" Wood laser cut-out; DIY wooden headboard; Iron Illumination swag lampsDIY hanging side table; Ikea Floor Lamp; Move Loot Winged arm chair; DIY tree slice side table; DIY floor-length curtainsRUGS USA area rug

Annie's Studio Kitchen Tour

Ikea Grundal Kitchen Bars

Long awaited and slightly spoiled by my SmallCool Contest... the "after" photos of my tiny little SF kitchen! Let's first take a trip down memory lane. Remember what my kitchen looked like when I moved in? Here's the "before" post and a few photos below. 

Apartment kitchen before and after
Before and After

This is honestly my favorite space in the apartment. Not just because it's where I cook dinner (Cough. Excuse me. Where I warm up pizza from the Whole Foods Refrigerated Section.), but also because it was the first room here in SF that I got "done."

That's a funny word, because of course no room is ever "done." A space grows and changes with your needs and taste. But, this was the room that I focused on making me right away. Moving here was really hard. I mean, I'm so happy I did, don't get me wrong. But living 2000 miles away from my family and everything I know -- that was a challenge. I really needed to make something here in SF mine, and I wanted to do it as quickly as possible. I did it here in this tiny kitchen. 

Que end of the sappy part of this post :D Anyway, you can see for yourself how the space evolved in the photos below. But I also wanted to point out a few of what I consider the "big impact" items:

  • Removing the cupboard doors. I did this RIGHT away. It's super easy, for you other renters out there. Literally just unscrew the hinges. Of course, before I move out, I'll have to screw them back on, but I absolutely think removing these doors opened the room a TON.
  • HANG EVERYTHING. Literally, everything. I hung pots and pans, I hung knives, I hung the paper towels, I hung plants, I hung baking supplies, I hung my pictures (as magnets on the fridge). There is one drawer and two "food" storage cupboards in this kitchen. That's not enough room for anything. Utilizing the wall space was imperative.
  • Draw the eyes up. It's true what they say, if you put something above the natural line of vision, your eye will travel up to see it. This layering of height helps the space feel much larger. I did this through the art above my cupboards and the hanging copper plant rod (a DIY I can share here, if you'd like!).
  • Speaking of the plants, Greenery. I've never had plants before, but now I have three succulents in the kitchen, two herbs the wall, mint in the corner, and an air plant on the fridge. You might think I'm crazy for saying this, but I feel like they're like my little pets! It's so fun to watch them grow. The plants add some needed life into this tiny kitchen.
  • You might notice I don't have a microwave.... so that's my final tip. Challenge yourself. I didn't think I could live without a microwave (ugh, pampered much?), but it actually is totally fine. I use this awesome wok that I found at a Thrift Store to make oatmeal in the morning and heat up leftovers. Those were pretty much the only reasons I ever used a microwave anyway! It feels great to save the space the microwave would have taken up.
Cute Tiny kitchen
Tiny Kitchen solutions
Plants in a tiny apartment kitchen
Small kitchen solutions
Tiny kitchen

Photos: Diana Lustig | Sources: Ikea Grundtal Kitchen Rods (pots and pans); Urban Outfitters Swan Watering Can; Bed Bath and Beyond Paper Towel Holder; Target Trash Can; Ikea Magnetic Knife Bar; Ikea Double Tiered Drying Rack; Hanging plants, Hanging Shelf and Modern Planter DIY's; Amazon Le Parfait Jars.


Call for Voters: Small Cool

Hello! Hi! Howdy! I'm really pumped because 1) I finally get to share some photos of my apartment with you and 2) I'm a contestant on Apartment Therapy's Small Cool Contest this year! It's kind of a dream of mine :)

That's why I'm here, actually. I would really love your vote. 

If you feel so inclined, please click on this link and "favorite" my entry on apartmenttherapy.com. I'm in the teeny-tiny division! 

If you don't have an account with Apartment Therapy, you can submit your email to receive a new url in your inbox to cast your vote. The contest is over this Friday (May 6) at 9am PST. After it's over, I'll take you on an official tour of my kitchen and studio. 

Love you guys so much!


Photos: Diana Lustig / Edits: Adobe Photoshop

DIY: Hanging Side Table

Easy DIY hanging Shelf

Hi my name is Annie and I hang things from the walls. 
Hiiii, Annie. 

This is how my imaginary addiction class scene goes when I play it in my head, because guys I am addicted to hanging things. It's an age old rule that in a small space you need to make use of vertical height. But in all my small spaces, I've never been quite so into it as I am now.

Anyway, this DIY hanging side table is the simplest project I've ever shared.

Find yourself a piece of wood scrap. Got it? Good. Now use a power  drill and bit to drill a hole in all four corners. Cut four very long pieces of rope and feed one end through each hole of your board. Tie a knot on the ends to keep the board in place.  Using a  level, gather the other ends of your rope and tie them to a cup hook in your wall. Done.

Confession: I decided to do this one night after my sister and I did a nice number on a bottle of wine. Yea. I did this entire thing in about 10 minutes, while I was tipsy. That's how easy it is. 

Wood Scrap: Had
Rope: Had
One Cup Hook: Had
Total: Free! 
Or if you're starting from scratch, about $10

Easy diy hanging shelf
Easy diy Hanging Shelf
DIY hanging shelf

Annie's Studio: Before

Got 20 seconds? I'll take you on a tour of my apartment!

Annies Small SF Apartment
Annies New Small Apartment

Okay, there it is. Haha. Small, huh? I stood inside one closet to take the first picture, and the opposite closet to take the second. These are from "before." Before I walked down the street and bought a mattress; carried a bed frame six blocks uphill; built my kitchen table; and recreated the standing desk.

When it's empty like this, you can really tell how little it is!

I won't lie to you. It sucked at first. As a homebody, one of my life rules is this:  fall asleep in a space where you feel comfortable and everything else will work itself out. I was not super comfortable when I first moved in this space. I was living in a brand new city, had just sold or donated all of my belongings, and was facing a pretty major culture shock. 

I found out pretty quickly I was going to have to grow some thicker skin. There's a lot of noises that go on outside my window at night. A. LOT. I thought by living and working downtown Cincinnati I had been exposed to a fair amount of homelessness and/or mental illnesses. Not true. It's extremely heartbreaking and still upsetting every time I pass a woman or man sleeping in front of my building.

It was a big change, and it was hard. I really wanted to give up, but I didn't. And one day, after several months -- well, I ended up making this space a real home. 

I love my apartment now. You've seen a lot of the updated space through my other blog posts, but I'll write up an official documentation soon. And don't worry, in the end I did get that thicker skin. I've got mad street cred now. Well, more street cred than when I moved in, at the very least 😏.


Photos: Nikond3200 Kit Lens/ Edits: Adobe Lightroom